Hello friends, Angel One App Download, Angel One Application Download, Angel One Apk Download: In this part, we ‘ll explore the Angel One Application —find out what it is, download it, learn how to set up a demat most account, and potentially earn some income. Let’s understand how to use its features. Additionally, we will cover the steps to withdraw funds from Angel One as well as how to delete an account if necessary.
As reported by Business Today, 17% of India’s population participates in the stock market. Furthermore, only 10% of these investors actually make a profit. Investing in the stock market has become quite easy thanks to see the plethora of mobile applications available today. However, it is important to choose an investment through a reputable application.
If you are thinking of putting your money in the stock market, this article will introduce you to a popular app called Angel One. To begin, let’s explore what Angel One Application is.
Angel One is India’s digital trading platform , which enables users to trade the stock market with minimal that brokerage costs. This single app facilitates investment across various exchanges like BSE, NSE, MCX and NCDEX anytime using phone, email or SMS . In addition, Angel One provides insights and analytical support for traders.
Formerly known as Angel Broking, the app was rebranded in 2021 and is now called Angel One. Apart from all trading in the stock market, you can also use this app to invest in mutual funds or IPOs .
Documents Required to Create an Account on Angel One in Gujarati
Just like various trading apps, Angel One requires see certain essential documents to set up a Demat account . These documents are mandatory and without them you have will not be able to set up a demat account. Therefore, it is important to have all these documents readily available.
- Aadhaar Card (which is linked to your mobile number)
- PAN card
- bank account
- Your Aadhaar and PAN card should be linked with DigiLocker.
- Your signature on white paper
How to create a Demat account on Angel One in Gujarati
To open a Demat account with Angel One, start by providing best your name and mobile number. Next, enter your email address along with your PAN card number. After that, complete your PAN and Aadhaar card verification through DigiLocker . You will then need to submit your bank account information and all photograph for the digital signature process. Once you submit the online e-sign form, your account will be established within 2 to 3 days.
Opening a Demat account on Angel One Application is free. The outline provided earlier serves as a brief that overview, and additional steps may be included as you progress through the process. Below, you will find a detailed step-by-step guide complete with screenshots to ease your understanding.
Step.1 First install and open Angel One App .
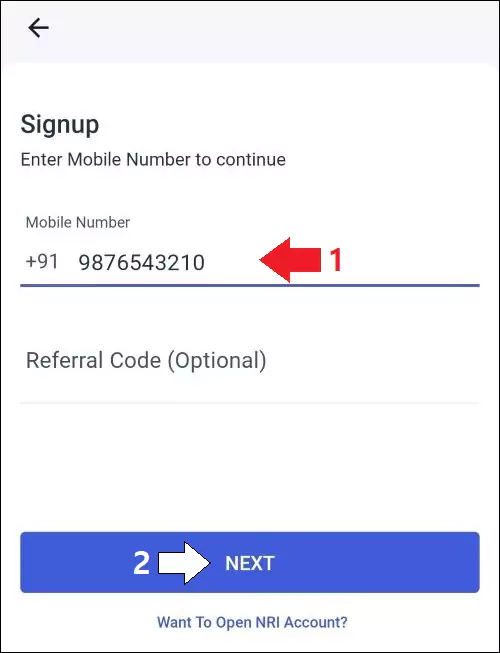
Step.2 Now click on the SIGNUP Button given below .

Step.3 After this enter your Mobile Number and click on Next . If you have a referral code you can also use it, otherwise leave it blank.
Step.4 Now Angel One app will ask you for some permissions which you keep allowing.
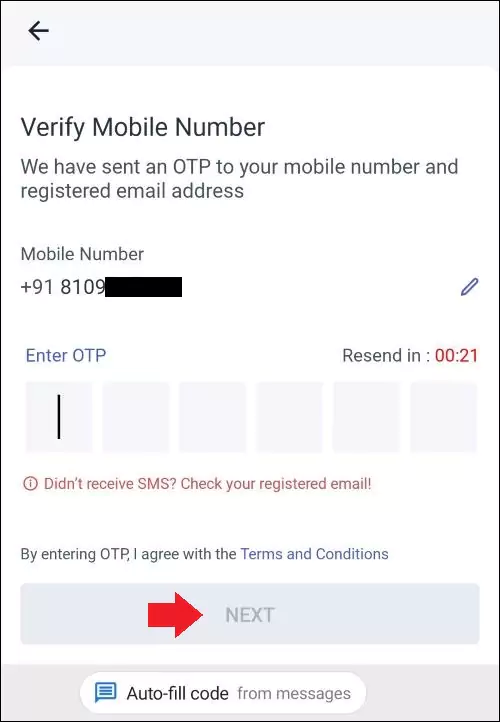
Step.5 After this, verify the mobile number with the OTP received on your mobile number .
Step.6 Now enter your name and click on NEXT option .
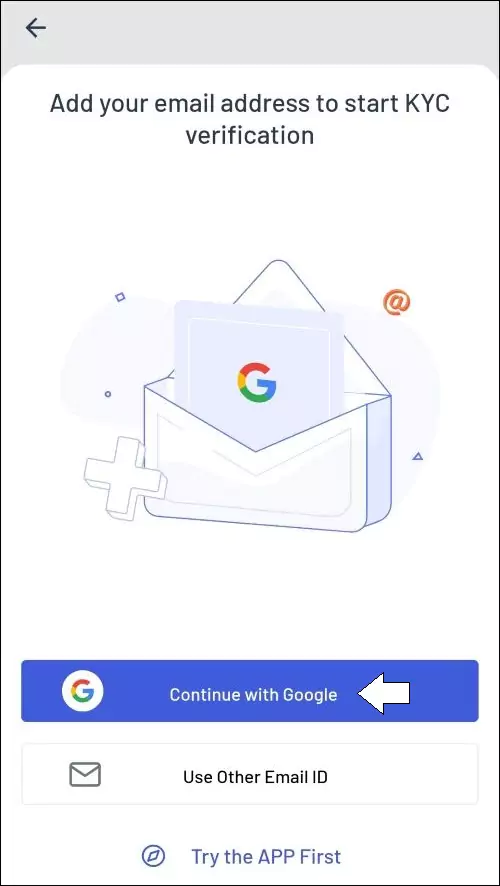
Step.7 After this login with your Google Account . (After this step, your KYC process starts which is completely online. If you want, you can see how the interface of this app is from the Try the App First option here)
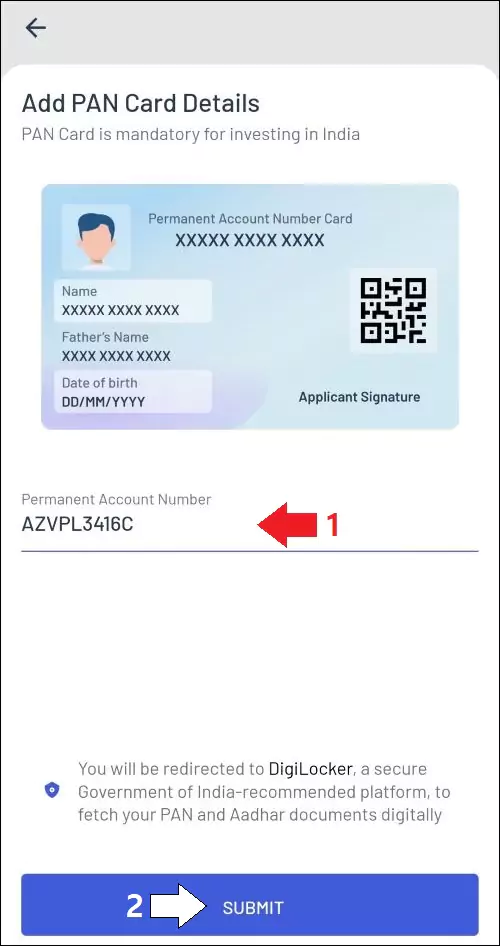
Step.8 Enter your PAN Card Number here and click on Submit
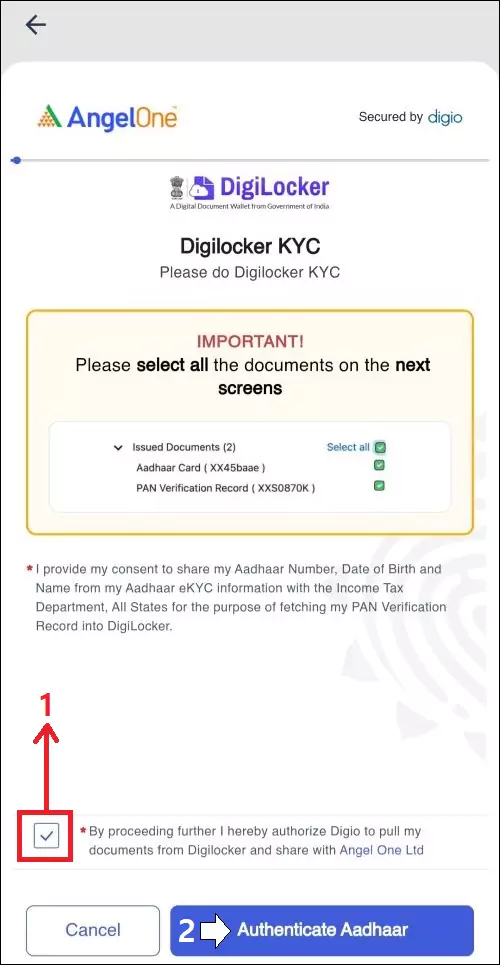
Step.9 After this you have to verify Aadhaar Card and PAN Card from your DigiLocker account (Don’t worry if you haven’t already created a DigiLocker account, you can create an account from here.)
Step.10 Now enter your Aadhar Number and do verification with OTP which will be sent to Mobile Number linked with Aadhaar Card .

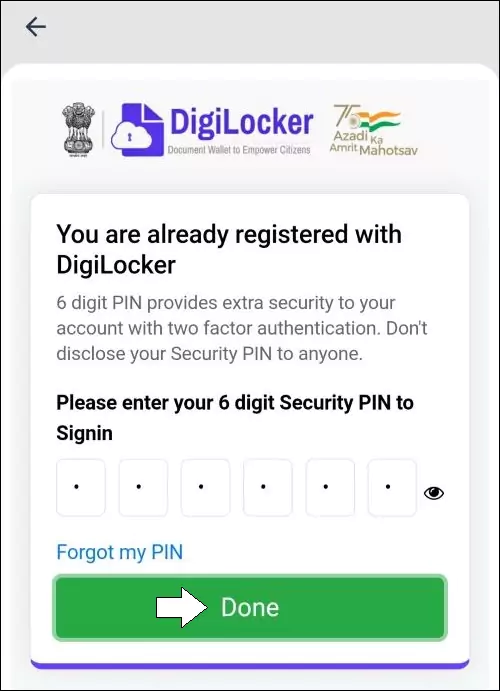
Step.11 If you have already created a DigiLocker account, enter its Security PIN (If you have forgotten the PIN, you can change the PIN by clicking on Forgot my PIN from here. And if you do not have a DigiLocker best account, then (Enter Aadhar Card and there will be an option to LINK PAN Card.)
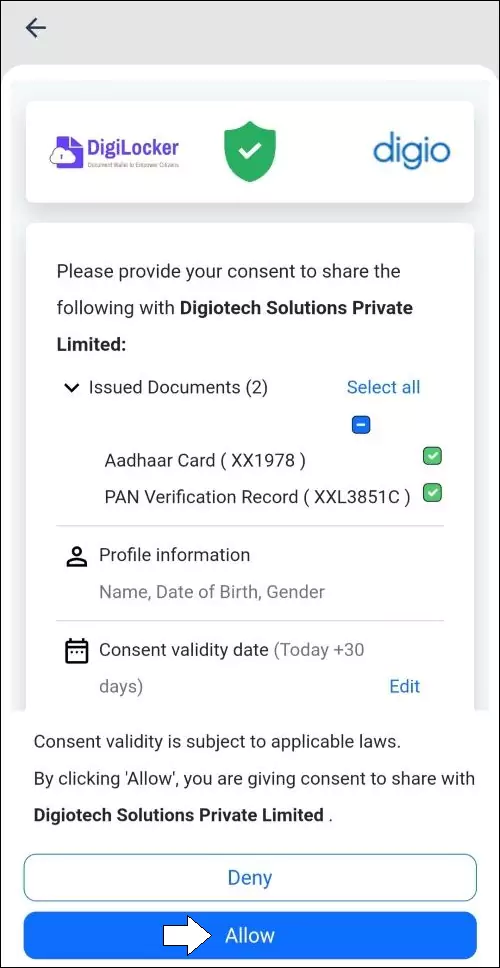
Step.12 Here, tick Aadhar Card and PAN Card and click Allow .
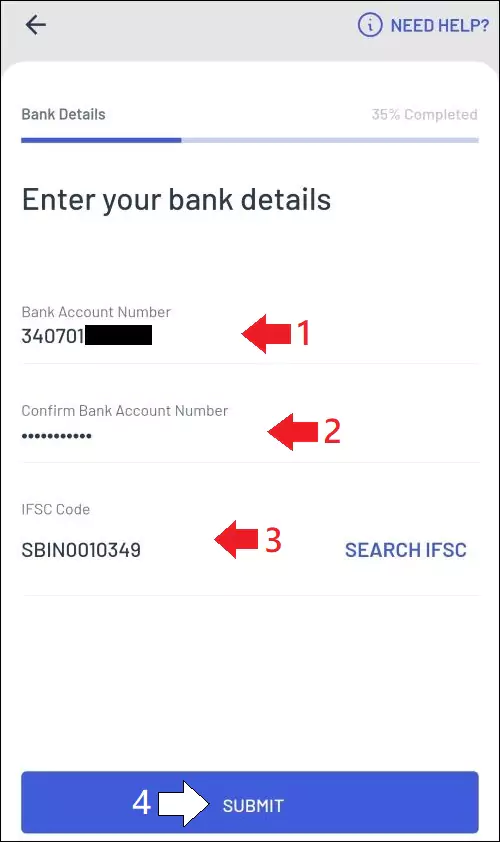
Step.13 After this, enter your bank account details like Account Number and IFSC Code and click on Submit .
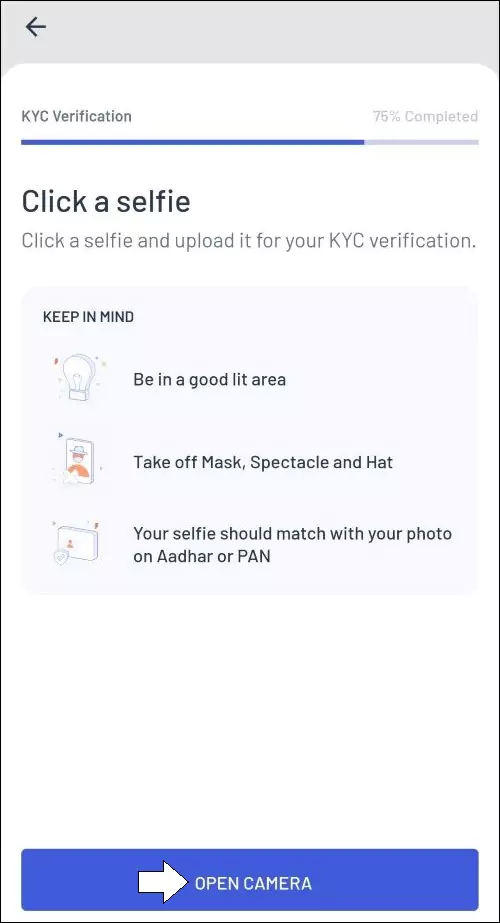
Step.14 Now you have to take a selfie in which your face is clearly visible. For this, click on OPEN CAMERA and after taking Selfie , click on Save and Continue option.
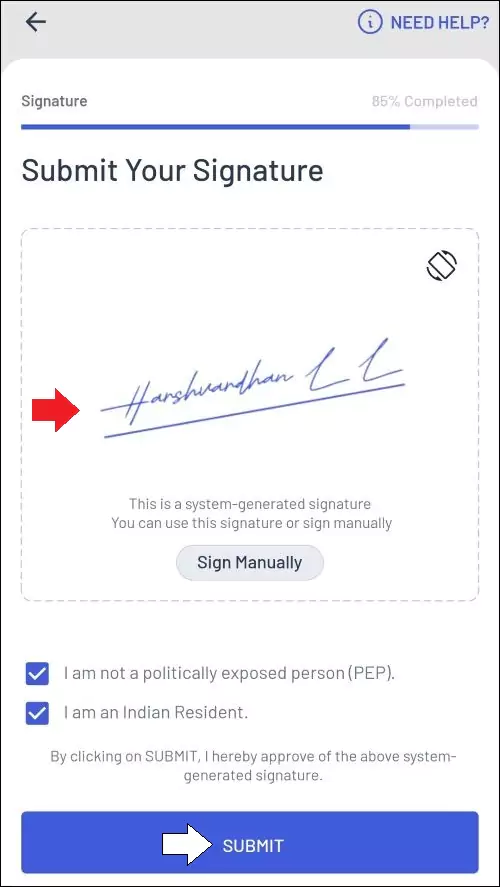
Step.15 After this, Angel One will generate a signature as per the name given in your name Aadhaar Card which you can use for your Online Form. Here, tick both the checkmarks and click Submit (If you don’t like the sign, you can manually click on the sign and sign it yourself.)
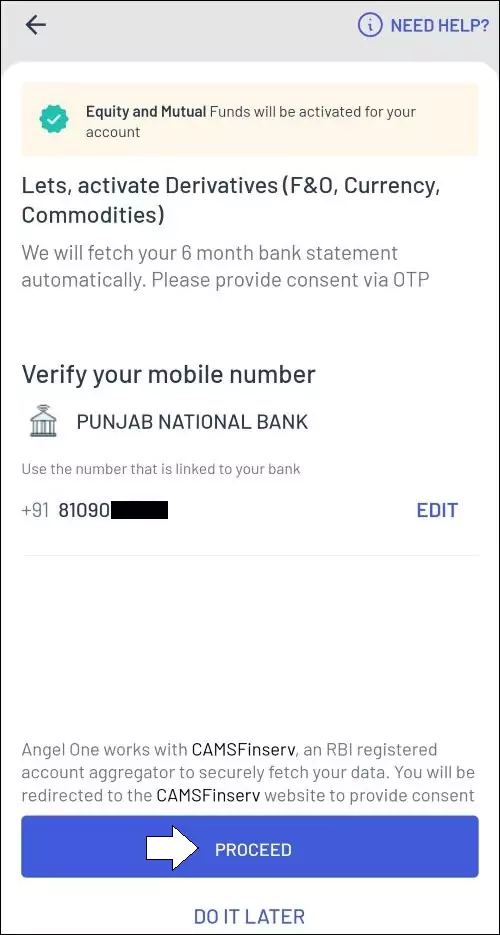
Step.16 Now you have to give 6 months statement of your Bank Account online. For this click on Proceed or if you don’t want to do it now then click on Do it later .
Step.17 After this, enter some of your personal details like Annual Income, Type of Employment, Father’s Name, Gender, Marital Status etc. and click on Proceed .
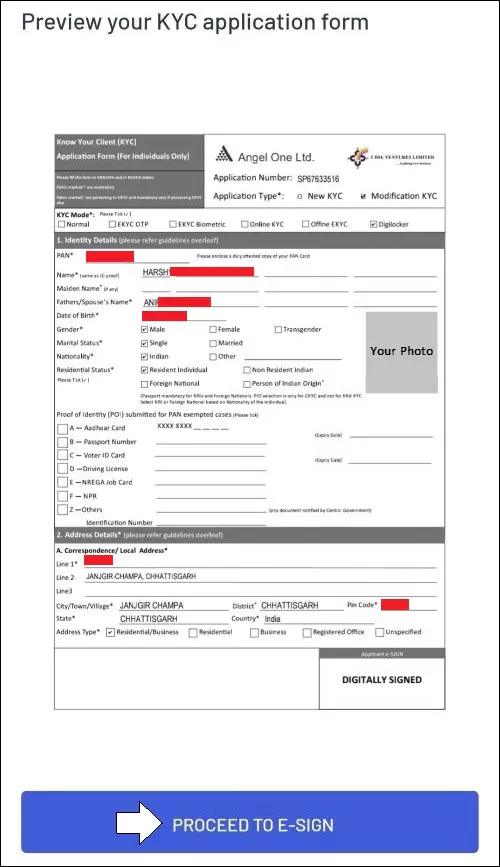
Step.18 Now your online form is ready, click here on Proceed to E-Sign .
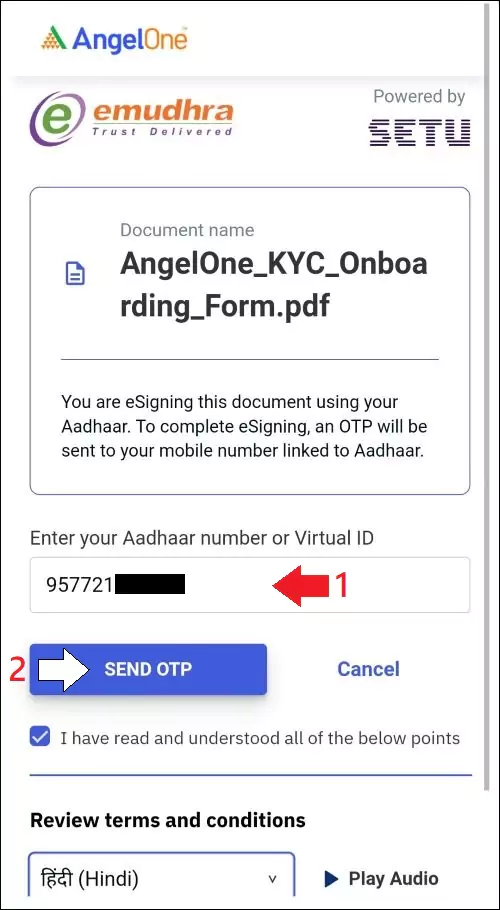
Step.19 To submit form online , enter Aadhar Number and click on Send OTP . Verify the OTP when it arrives and your Online Form will be sent for review.
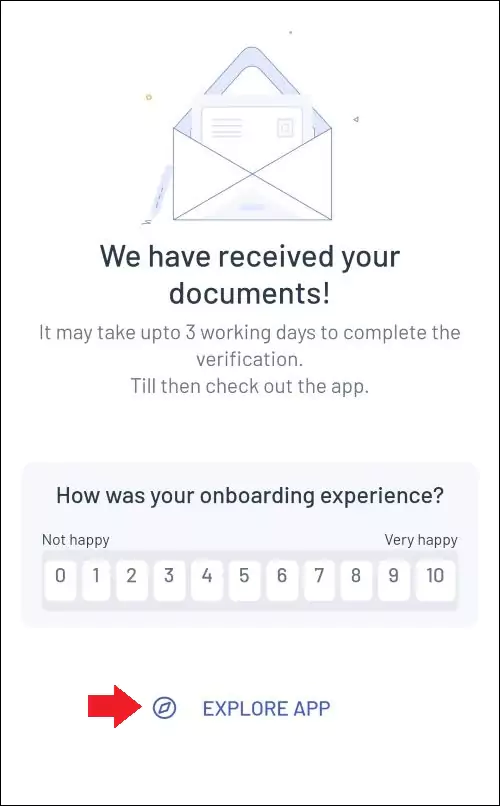
Step.20 It takes 2 to 3 days to activate Angel One Account. Until your account is activated, you can explore the Angel One Application and understand the stock market.
How to use Angel One app?
Before using Angel One , certain steps need to be taken. Once your Angel one Account is live, the first step should be to establish your MPIN to avoid repeatedly logging in with your can mobile number and OTP. Navigating the Angel One app is straightforward thanks to its user-friendly and organized interface. This screen appears once you finalize the account creation process.
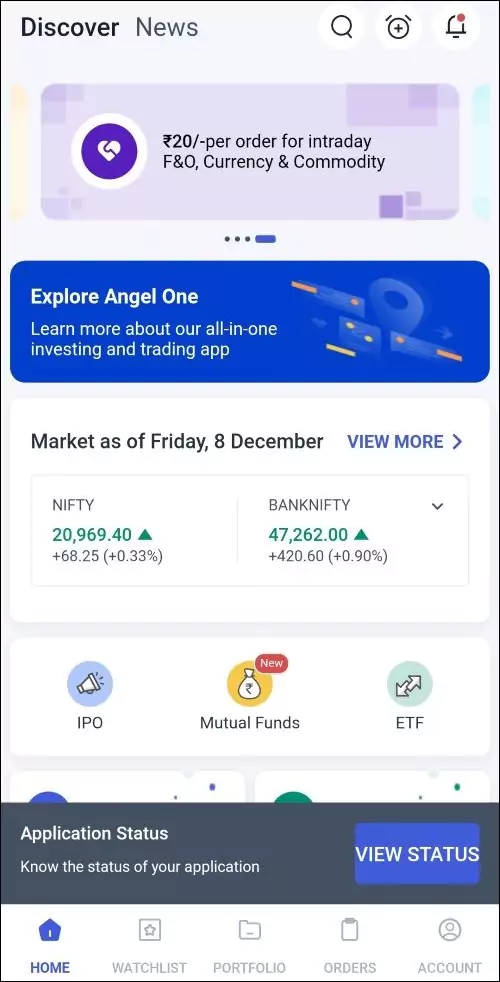
Home/Discover: Angel One’s landing page is called Discover. This area displays daily information about NIFTY and BANKNIFTY along with popular stocks for intraday, short term and long term trading. Additionally, you will find stock market related tips and learning resources at the bottom.
Watchlist: This section provides a default selection of stocks that you can evaluate for buying or selling. Essentially, it is a compilation see of your favorite stocks that you want to monitor. While the initial watchlist is already setup, you have the option to generate additional watchlists and include your preferred stocks in them.
Portfolio: This segment of the Angel One app provides details regarding all the stocks you have invested your money in. You can check the current profit or loss status of your investments here. This section includes options like Equity, Mutual Funds and SGB (Sovereign Gold Bonds), which represent different avenues of investment.
Orders: This section provides you with an option to specify your preferences for timing, method and quantity of buying and selling most your stocks. All purchased shares will be displayed here. You have the ability to establish a threshold for how much a stock can rise or fall before initiating a buy or sell action.
Account: This segment details how much money you have invested in your Angel One account. You can either increase your fund or withdraw your trading balance from this location. If you run into any issues, a support see feature is available at the bottom, along with a log out option at the end.
Note: This article is written to give you information only, we have read and analyzed all this information from news websites and newspapers. Check the official website for more than information. Because “gpscgujarat.in” does not accept any responsibility for the information provided here.
Important Links
| Angel One App Download | View Here |